
From the very start, the Scrivener writing app isn’t straight forward. I even stumbled over pronouncing it when I first discovered it 😉 While this useful writing app is wonderful, it does take a little getting used to. I’ve been using it for a couple of years now, and am using it for my current novel, so I thought I would share what I’ve learned along the way as well as how I use it.
It’s a one-time cost of $49 to purchase Scrivener (for Windows or Mac), and while there is a free trial available, there is not a free version. But trust me, the $49 is worth it.
Getting Started with Scrivener
When you first open up Scrivener you will be offered to take a short tutorial of the program. Do it. Most often, tutorials don’t really show you anything groundbreaking, but in this case, it can be very helpful for a program that is not all that intuitive.
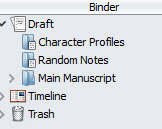
It’s helpful to think of any project within Scrivener as a 3-ring-binder with contents. In the upper left corner of the screen, you’ll see a binder icon. Clicking that will open up a side panel on the left that shows all the folders, and pages, in your binder. You can use this however you like. I like to have separate folders for the main manuscript, my character profiles, and random notes.
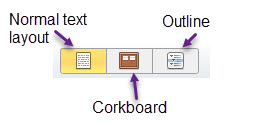
Make note of the icons at the top of the screen, they denote the different ways you can view your pages:
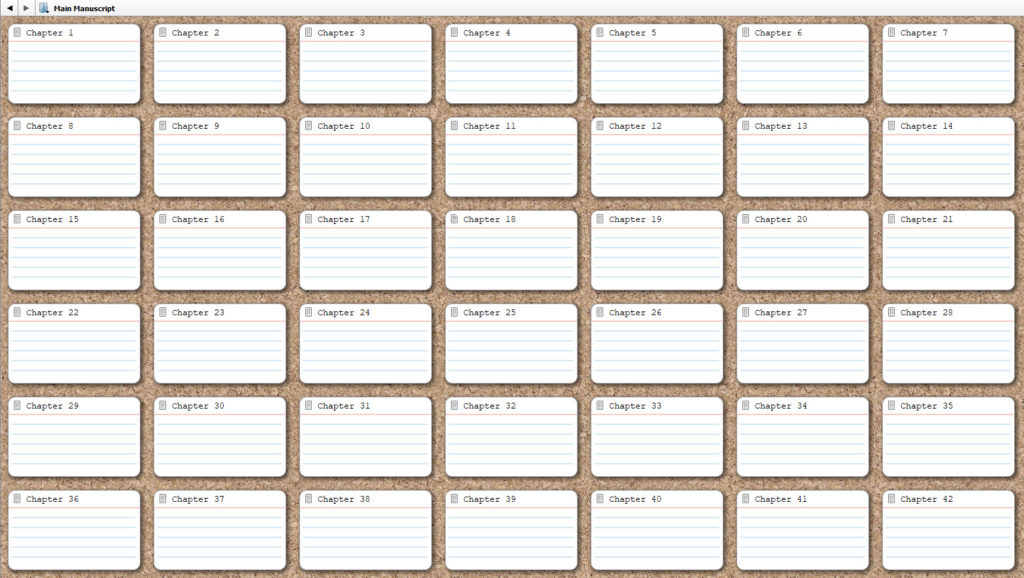
Here’s what the corkboard looks like; pretty cool feature:
Organizing Your Chapters
After using Scrivener, I will never ever again use Microsoft Word when working on a novel. The ability to section out chapters into different pages in your digital binder is so very helpful. No more frenzied scrolling through one document to find the chapter you want.
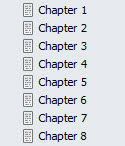
But, if you do want to see all of your chapters together, you can click on the folder that contains all the pages of your manuscript and it will display all the chapters together, separated by horizontal lines.
Creating A Timeline in Scrivener
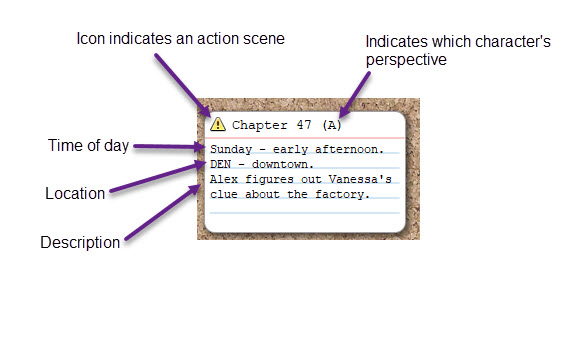
The timeline I made has been so helpful as I write my novel. It ensures continuity and allows me to keep track of the little details in my manuscript. I made a new folder for this and always view it as a corkboard. I ‘pinned’ an index card for every one of my chapters on the corkboard. Then I came up with my own system for how I would use this timeline. In the manuscript I’m currently working on, the point-of-view swaps between characters in each new chapter. I wanted to track this, along with the time of day in which the chapter is taking place, the location, and other details. I added all this onto an index card each time I wrote a new chapter. This way, if I need to reference where the sun is in the sky during a particular chapter, I easily see on the timeline what time of day the last chapter ended on, and make sure the scene makes sense in the next. Or, when I make a reference like ‘the next morning’, etc, I know the actual chronological timeline of my story is sound. You can also add icons to your index cards.
Here’s an example of one of the index cards in my timeline:
Tracking Word Count, Pages, and Setting Target Goals
As with Microsoft Word, the word and character counts will always appear at the bottom of the screen when you are working in a section. But if you’re like me, you become obsessed with the total number of words and pages in your manuscript as you get further along 🙂 Under the Project menu you will find the following options: Project Targets, Project Statistics, and Text Statistics.
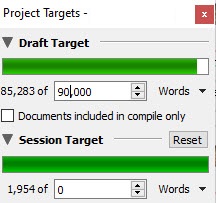
Project Targets are where you can track your progress against your goals. You can set a goal for number of words in your entire manuscript, and also just the chapter (session) you are working in:
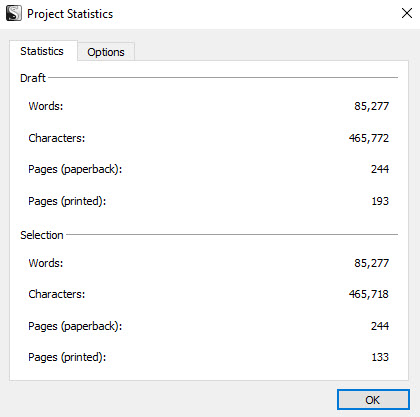
Project Statistics allows you to see information such as word count, character count, and paperback page count. You can customize what this is tracking by selecting only the pages, or chapters, in your manuscript for which you want this information.
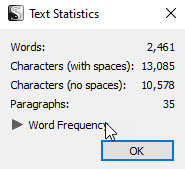
Lastly, Text Statistics will just show you the word count and character count (with and without spaces), and paragraph count for the page or chapter you currently have highlighted:
Saving Drafts in Another Format
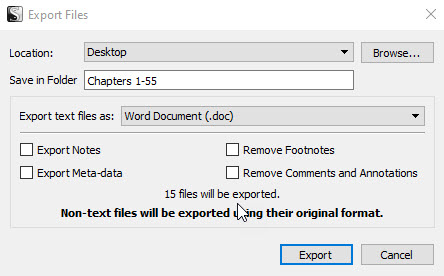
I’m an obsessive saver and don’t completely trust any program not to crash, lose data, and screw me over. Now, I’ve never had Scrivener crash, or any issues with it, but I’d rather be safe than sorry and I like to keep my manuscript files in other places besides Scrivener. The way I do this is to highlight all of the pages that I want to export, go to File, Export, Files, and then I choose my location, name the folder all of the pages will go in, and designate the file format. This will give you a folder filled with a separate file for each page (chapter) of your manuscript.
I haven’t yet finished my novel so I can’t speak to formatting and exporting for different formats like ebooks or paperback, but once I do I will cover that in a new post!
Scrivener: A Useful Writing Tool
I think you will find Scrivener to be a useful writing tool as you navigate and edit your manuscript. It does have more features than I am currently using, but this post covers the main things you would want to know when just starting out with the program.
Hi Katie. Greetings from the UK. I found your article so informative. I am writing my novel ‘ The Conflict Within’ in Microsoft Word. I use Windows 10 on my PC. Can I use Scrivener for this. It does seem an answer to my prayers. I would really love to hear from you. Kind Regards. Doreen.
Hi Doreen! Thanks for reading and commenting. I’m also using a PC with Windows 10 and Scrivener works great on it. I would highly recommend it.